
Measuring an Opening for a Frameless Shower Screen Panel
Measuring glass shower screen panels requires precision to ensure that the panel fits securely in the designated space. Here's how to measure your Stegbar frameless shower screen for a seamless result.
The showerscreen installation process is relatively simple, but the key to a brilliant end result is measuring all the necessary dimensions precisely before you begin.
To ensure your frameless shower screen panel fits neatly when your project is complete, we recommend you grab your tape measure and follow these six simple steps.
What you need:
- Tape measure
- Spirit level
Layout and Position
First, determine where you’d like the position of the panel to be within the shower enclosure. Consider the position of taps and shower heads which is typically where the most splash will occur. The positioning of your panel should make it easy and safe to get in and out of the shower and not impede access or detract from the natural flow of your bathroom.
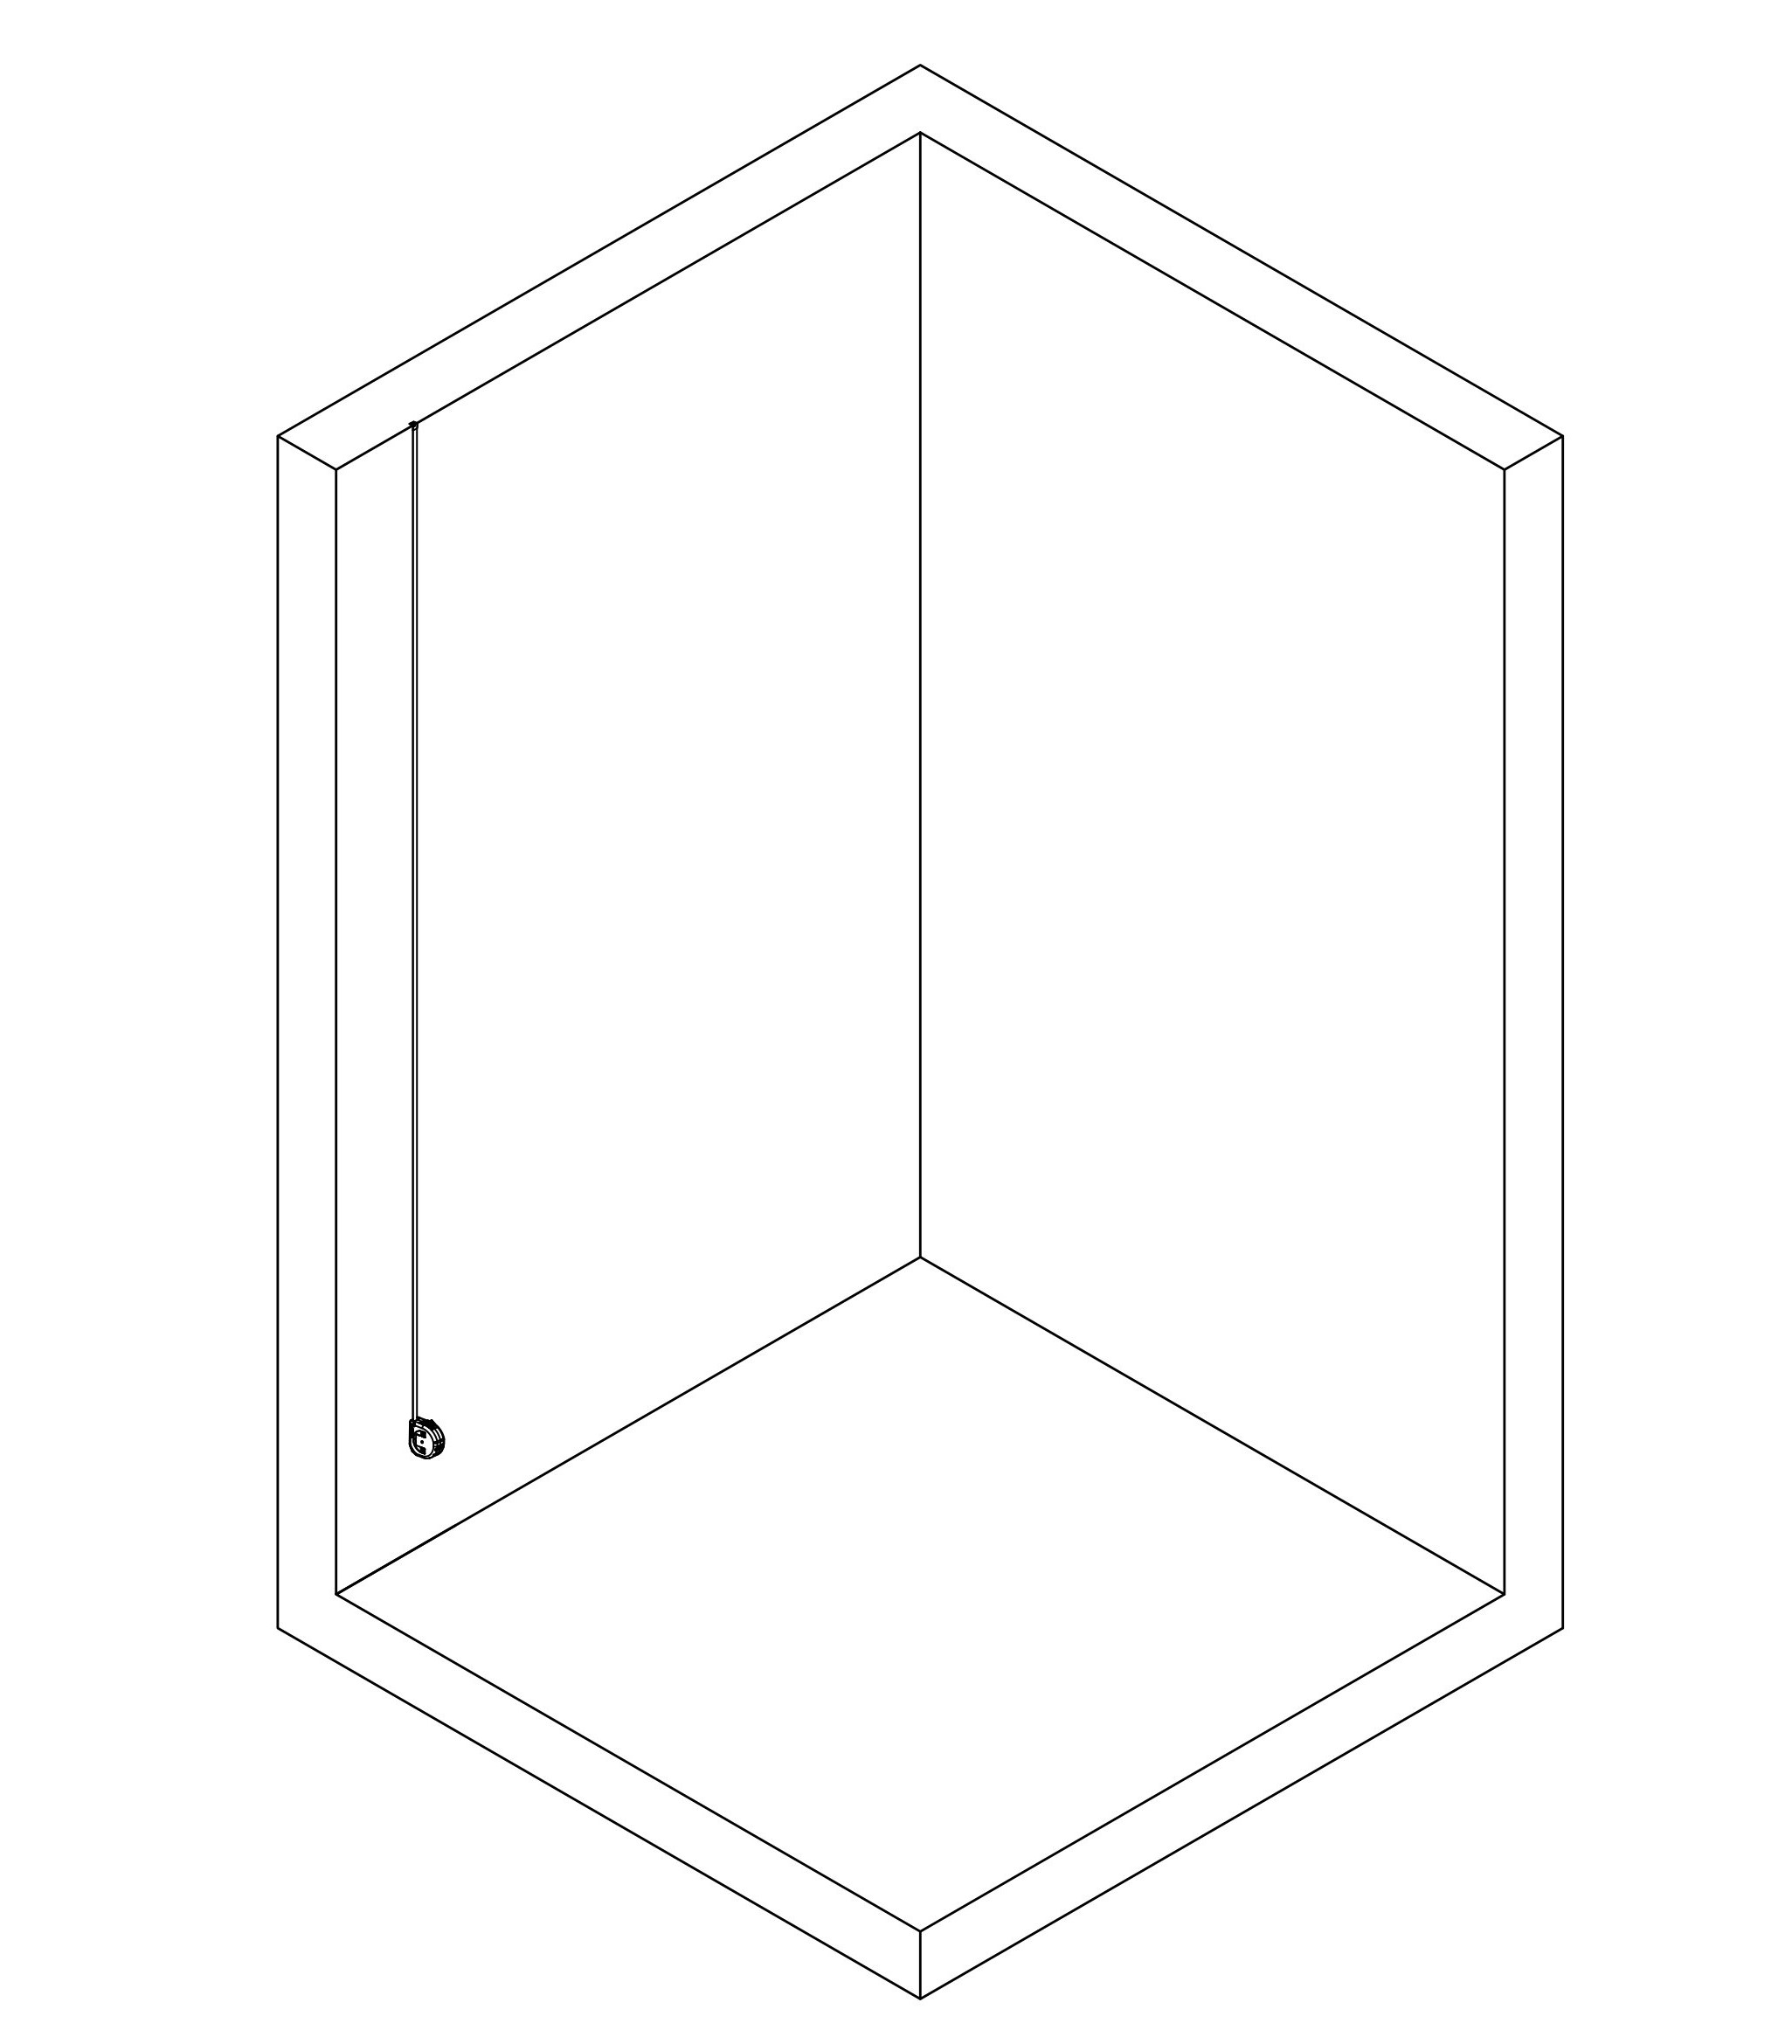
Measuring Shower Screen Height
Use a tape measure to measure the height of the space where the shower screen panel will be installed.
Place the end of the tape measure flush with the floor and measure up to the ceiling. Unless you have a heritage home with very high ceilings or a unique architecturally designed space, you’ll generally find most modern homes have a ceiling height between 2.1m and 2.4m.
Simple, unobstructed bathrooms make measuring easy, however, there may be some obstructions in the shower opening such as a profiled border or raised feature tile. You may prefer to have a glass showerscreen that sits level with feature tiles for aesthetic reasons too, so make a note of the height of any feature tiles if they form the upper limit of where you’d like your panel to sit.
You may need to order a custom shower screen to accommodate obstructions or specific tiling heights.
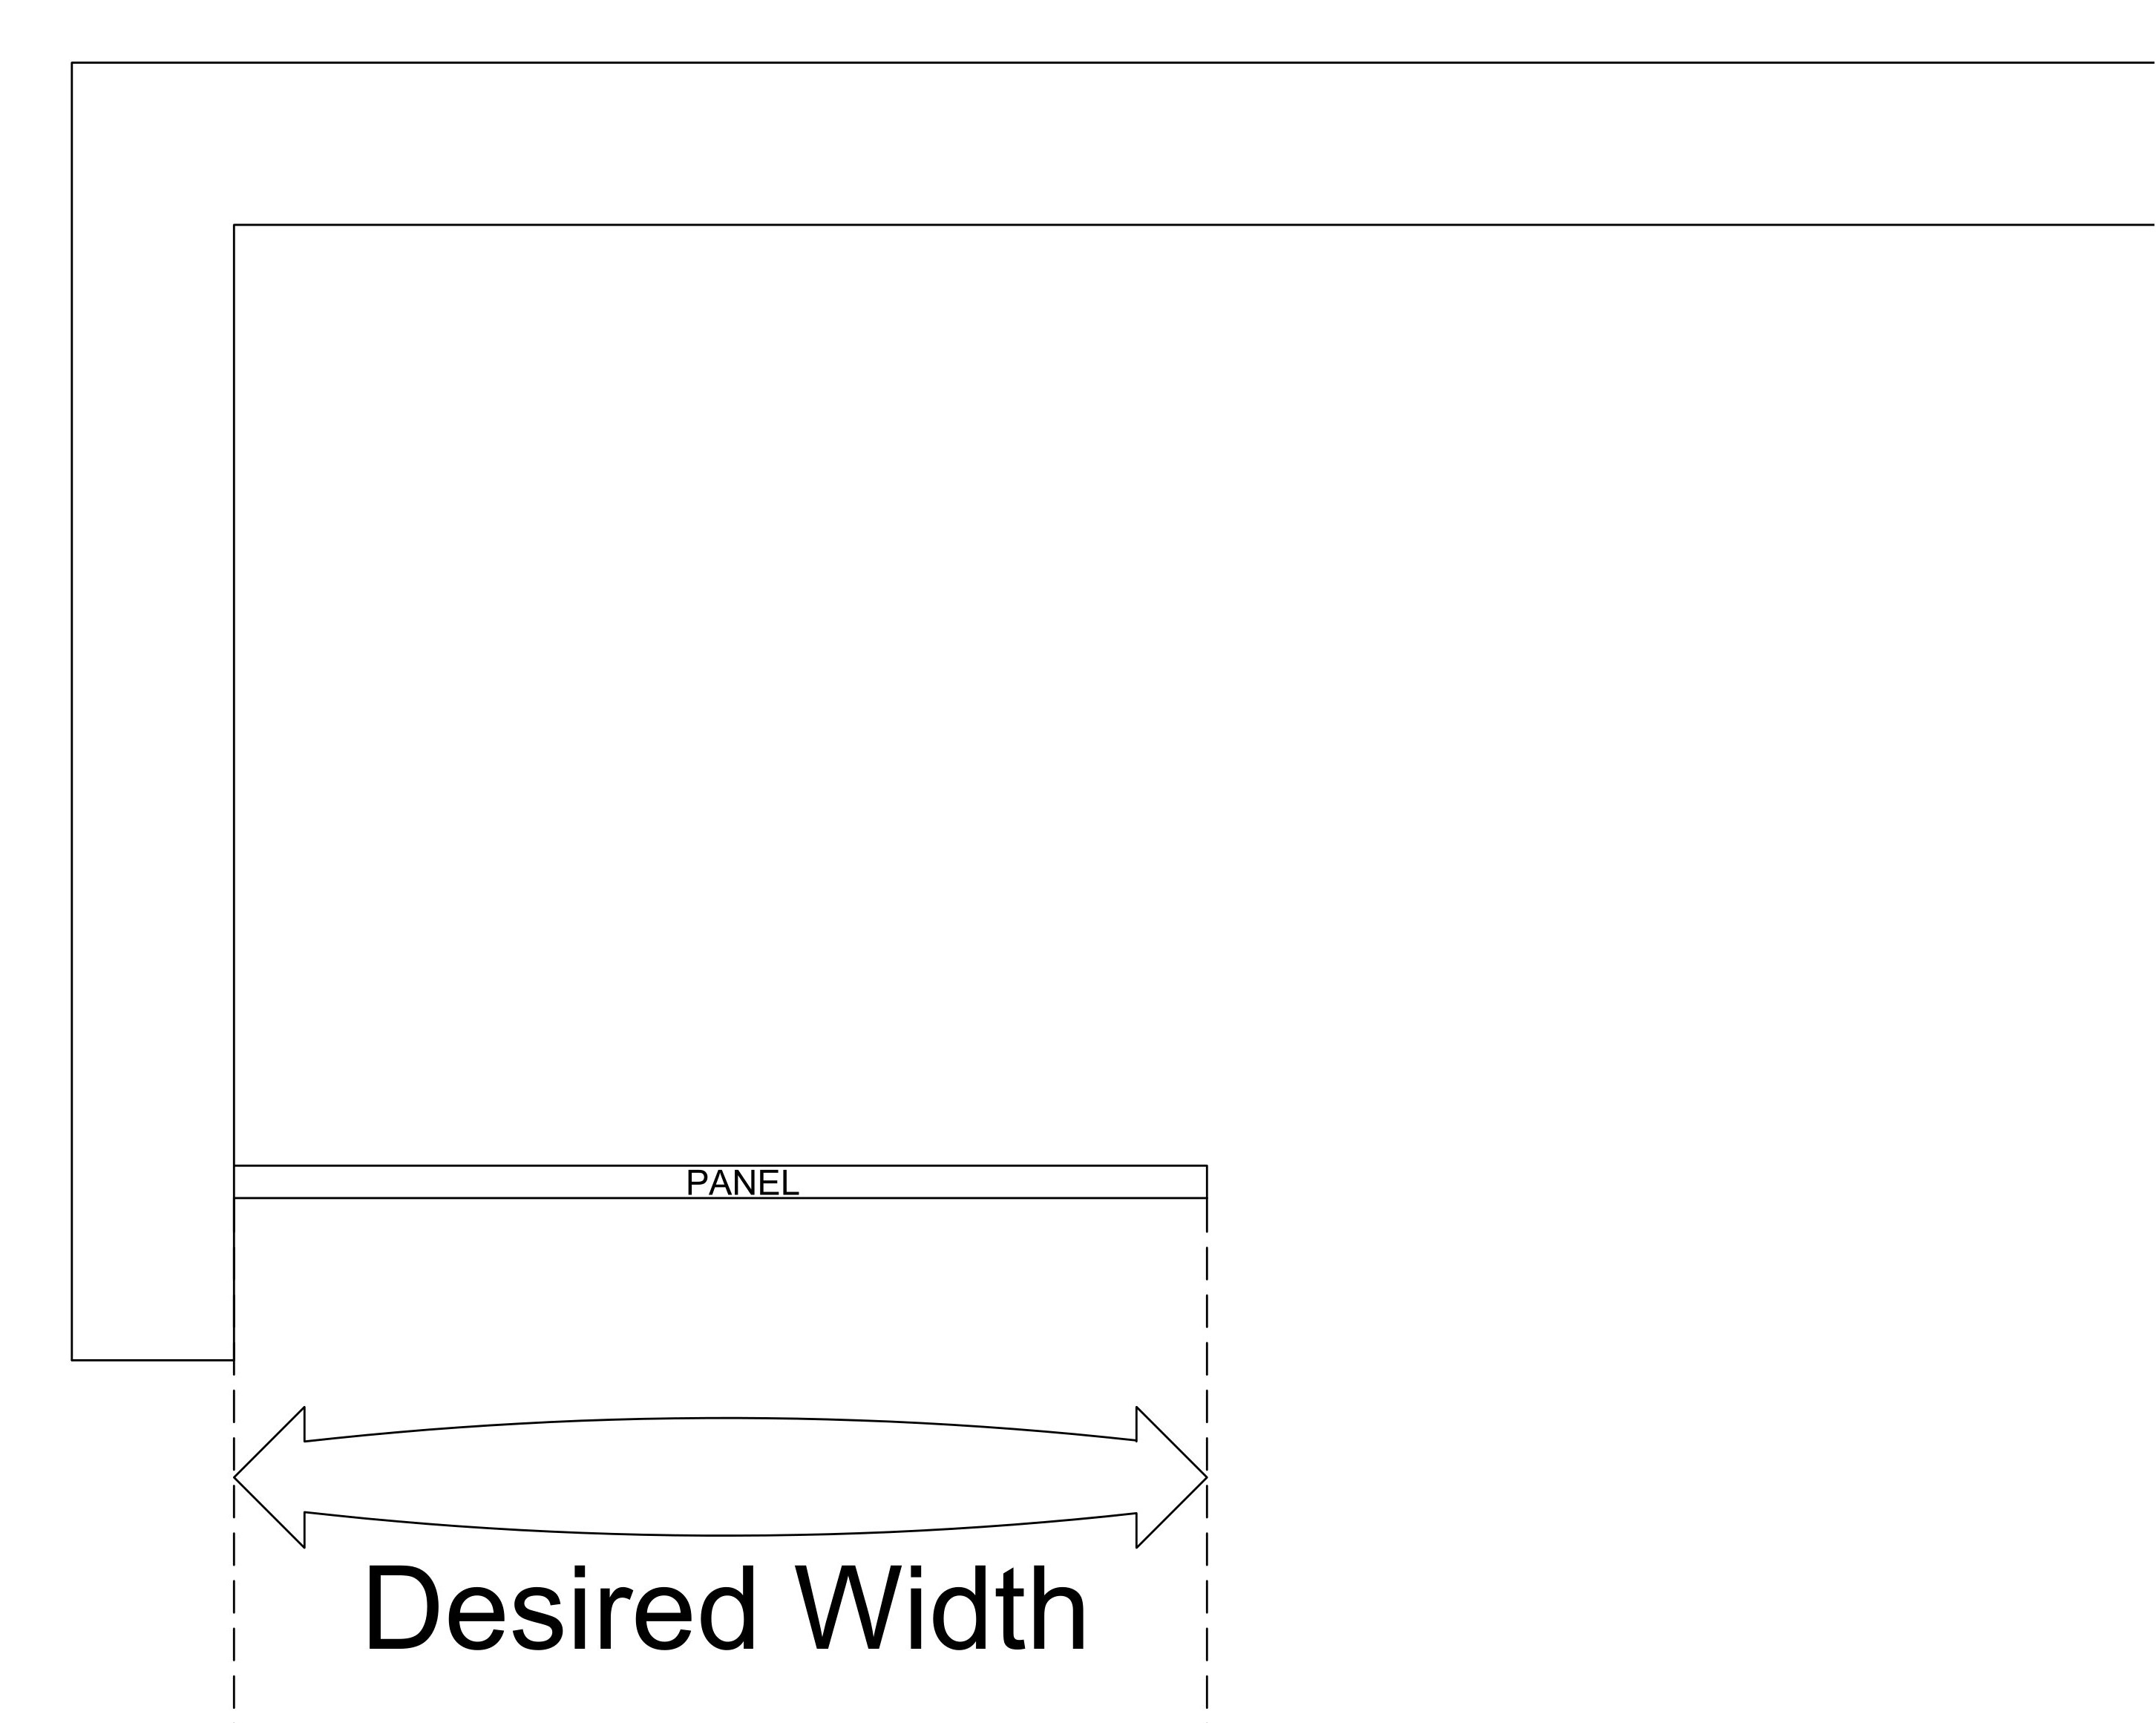
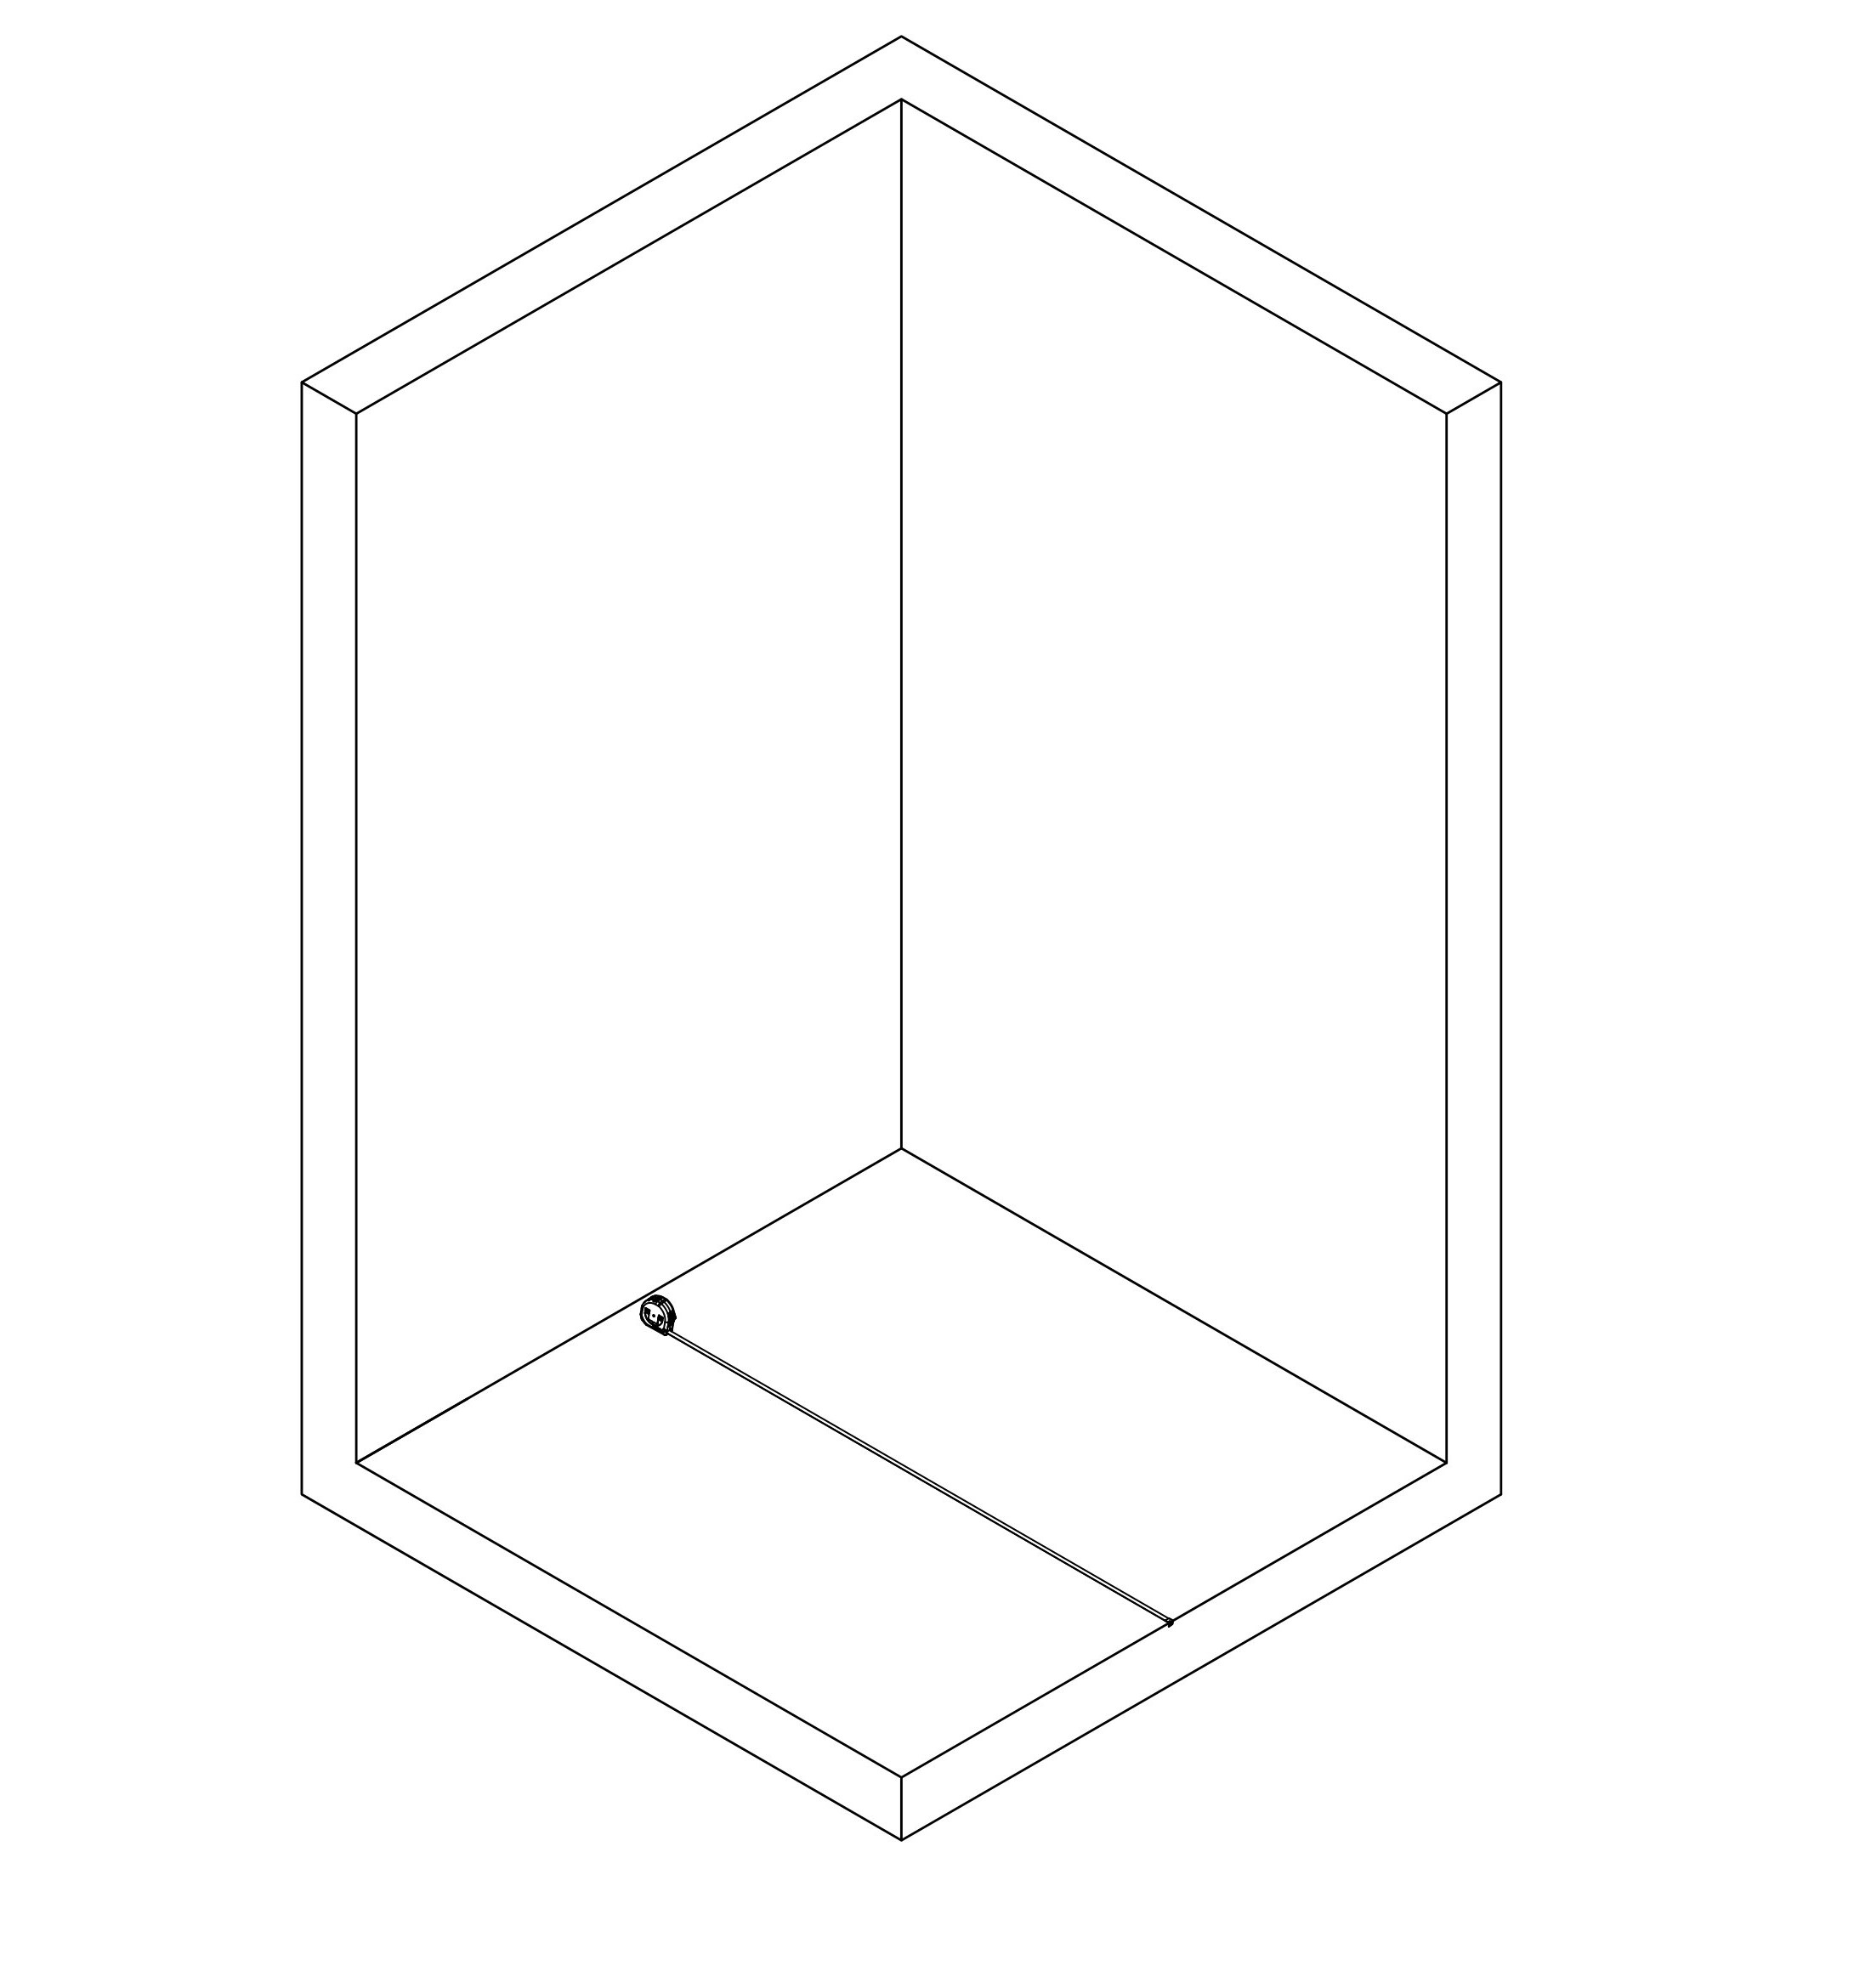
Measuring the Width
To measure the width of the space where the shower screen panel will be installed, use a tape measure to measure from one wall to the other.
If the frameless shower screen panel you purchase has a horizontal support bar, the width measurement is important to ensure you purchase a screen that fits the space. A custom shower screen may need to be purchased if the width of your shower enclosure is too small or too wide to accommodate our range of DIY shower screen panels.
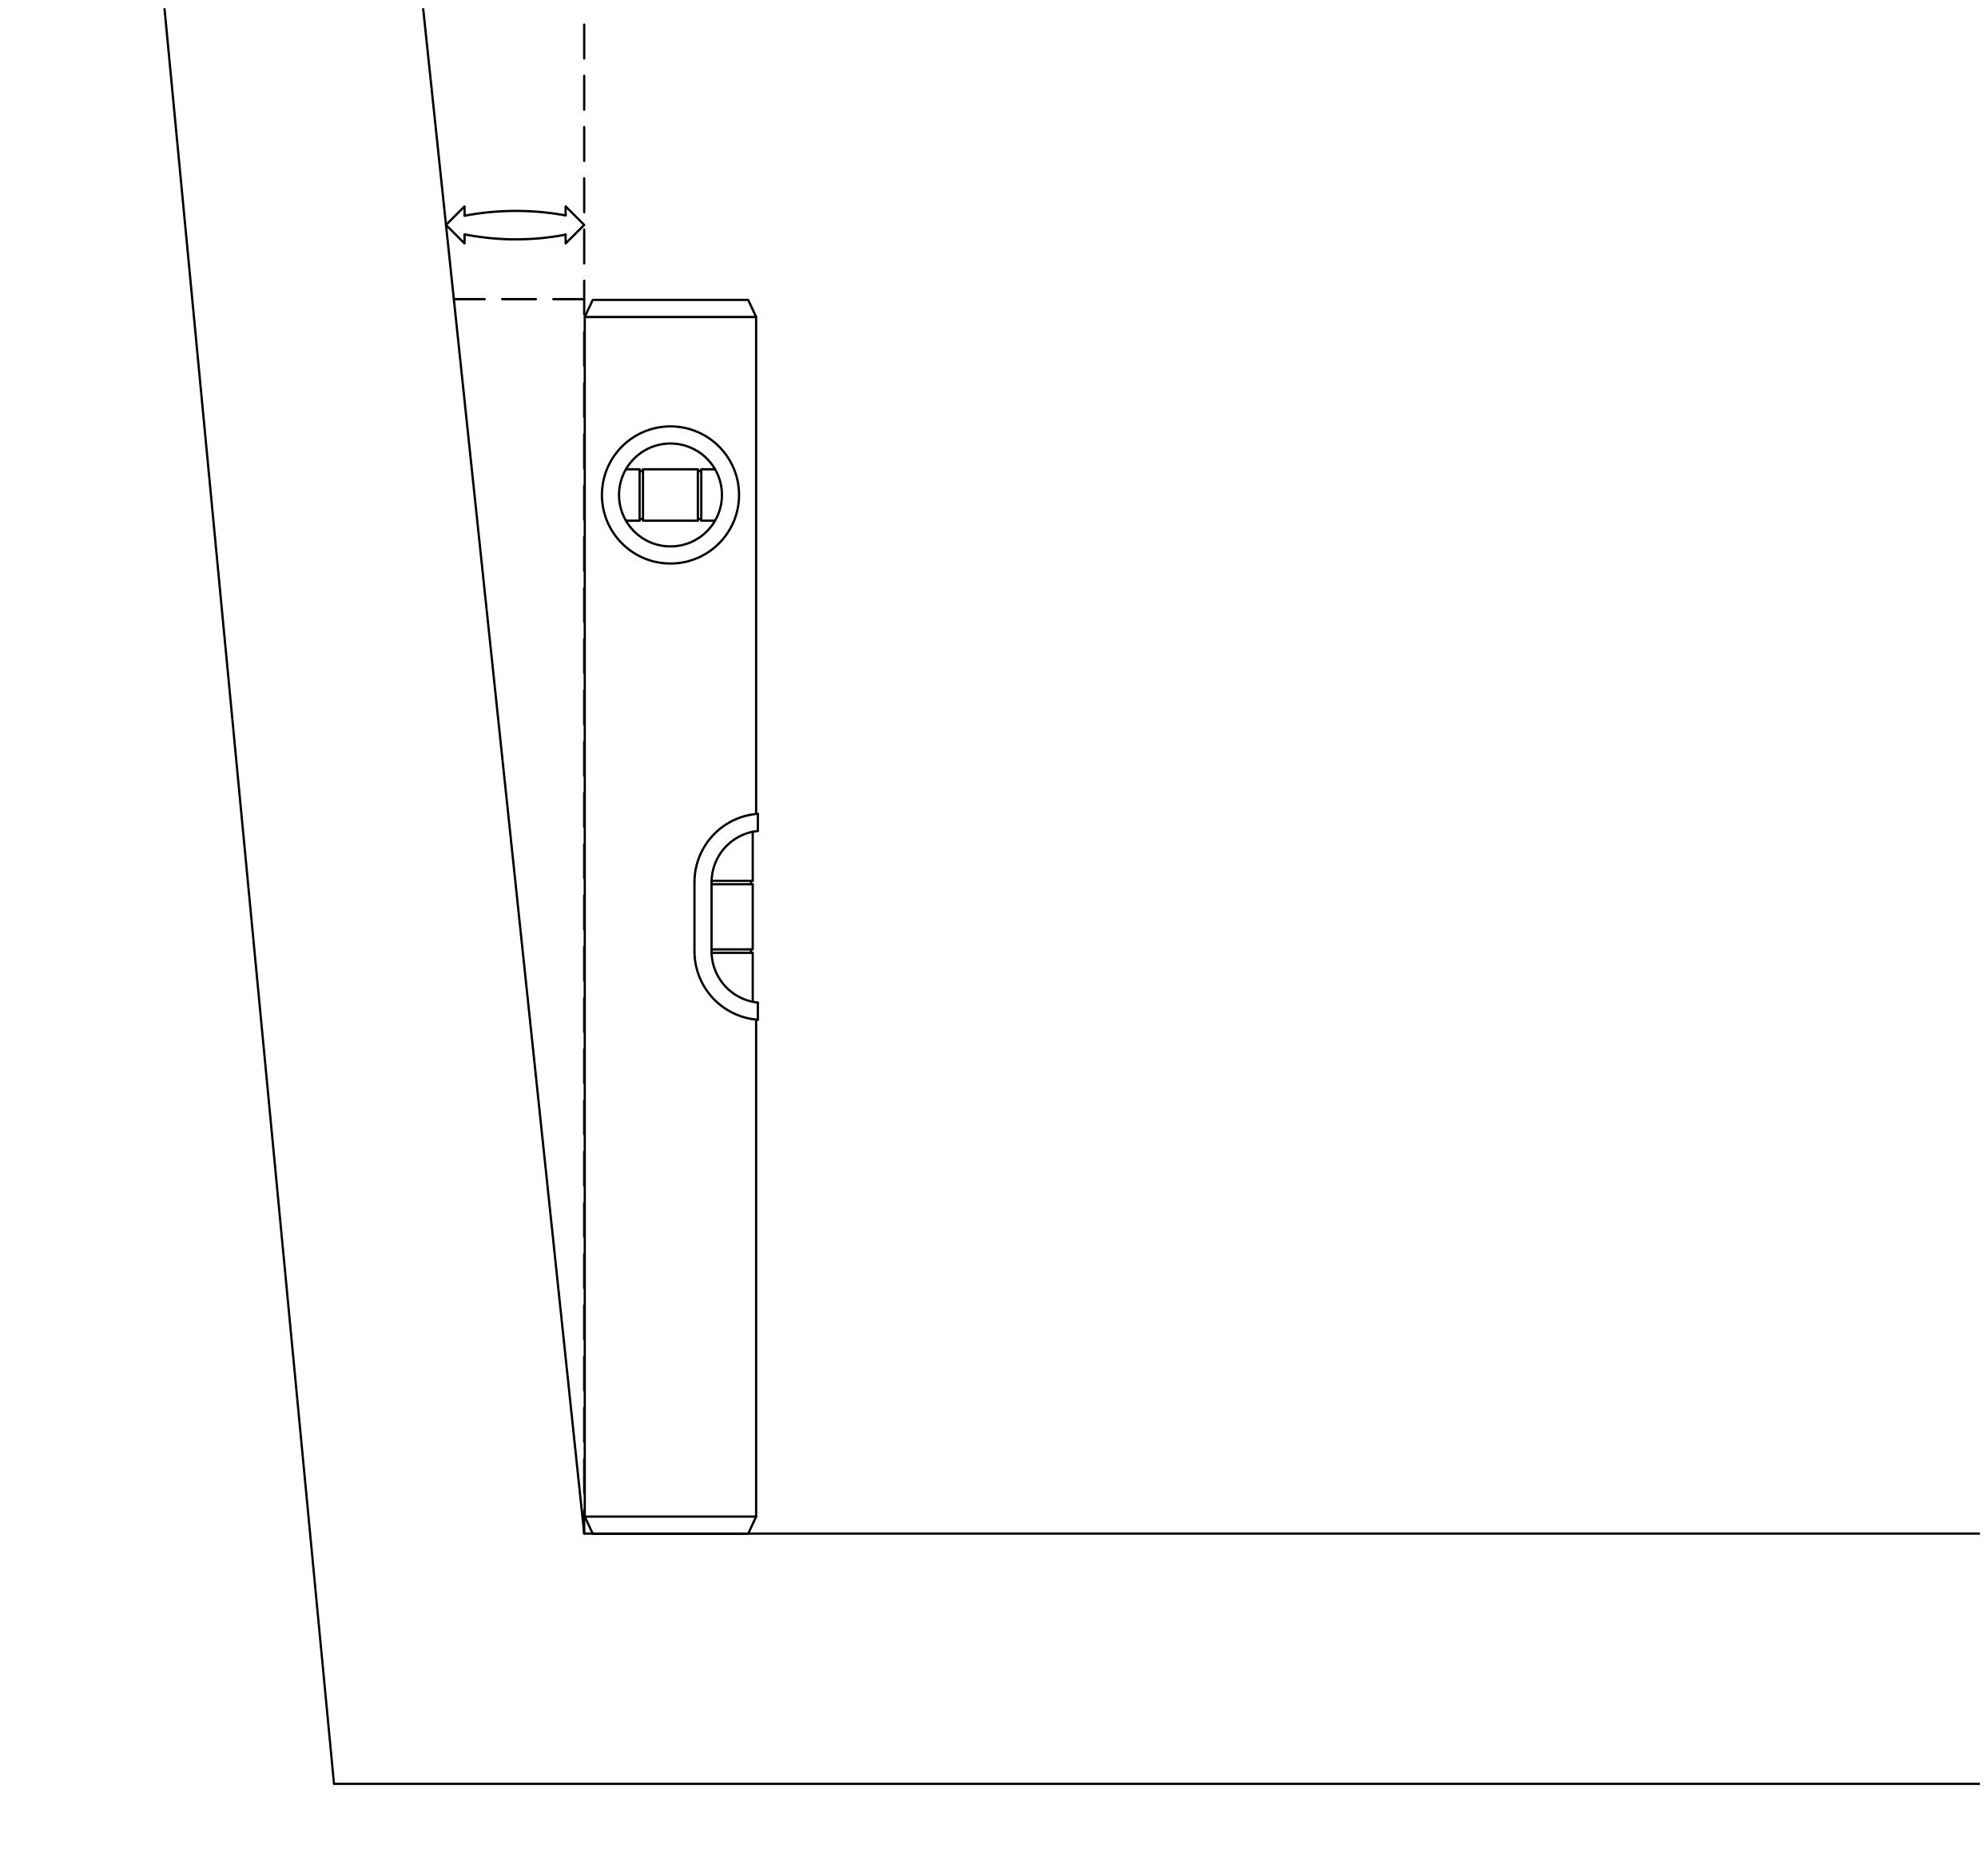
Check the Wall for Plumb
As houses age, it’s common for walls to move slightly out of plumb so they are no longer exactly square. Your glass shower screen panel is manufactured with precise 90-degree angles, however if your bathroom walls are not plumb, you’ll find that there are gaps along the edge.
To check if your wall is plumb, place your spirit level on the wall where your frameless shower screen panel will be positioned. If you find the wall is not plumb, measure the distance between the wall and the level – this can be as little as a few millimetres up to several centimetres. Stegbar’s DIY frameless shower panels are designed to handle some variations in fit, known as tolerances. Each model is slightly different, so we recommend you refer to the specifications for your selected frameless showerscreen panel.
Note the maximum runout tolerance of the panel to ensure the shower screen will suit your opening and any runouts. Runout is the ‘overflow’ measurement that stretches beyond the 90-degree angle, as shown at the top of this diagram.
If runouts exceed maximum tolerances, we can help you get the best result for your project with a custom showerscreen panel.
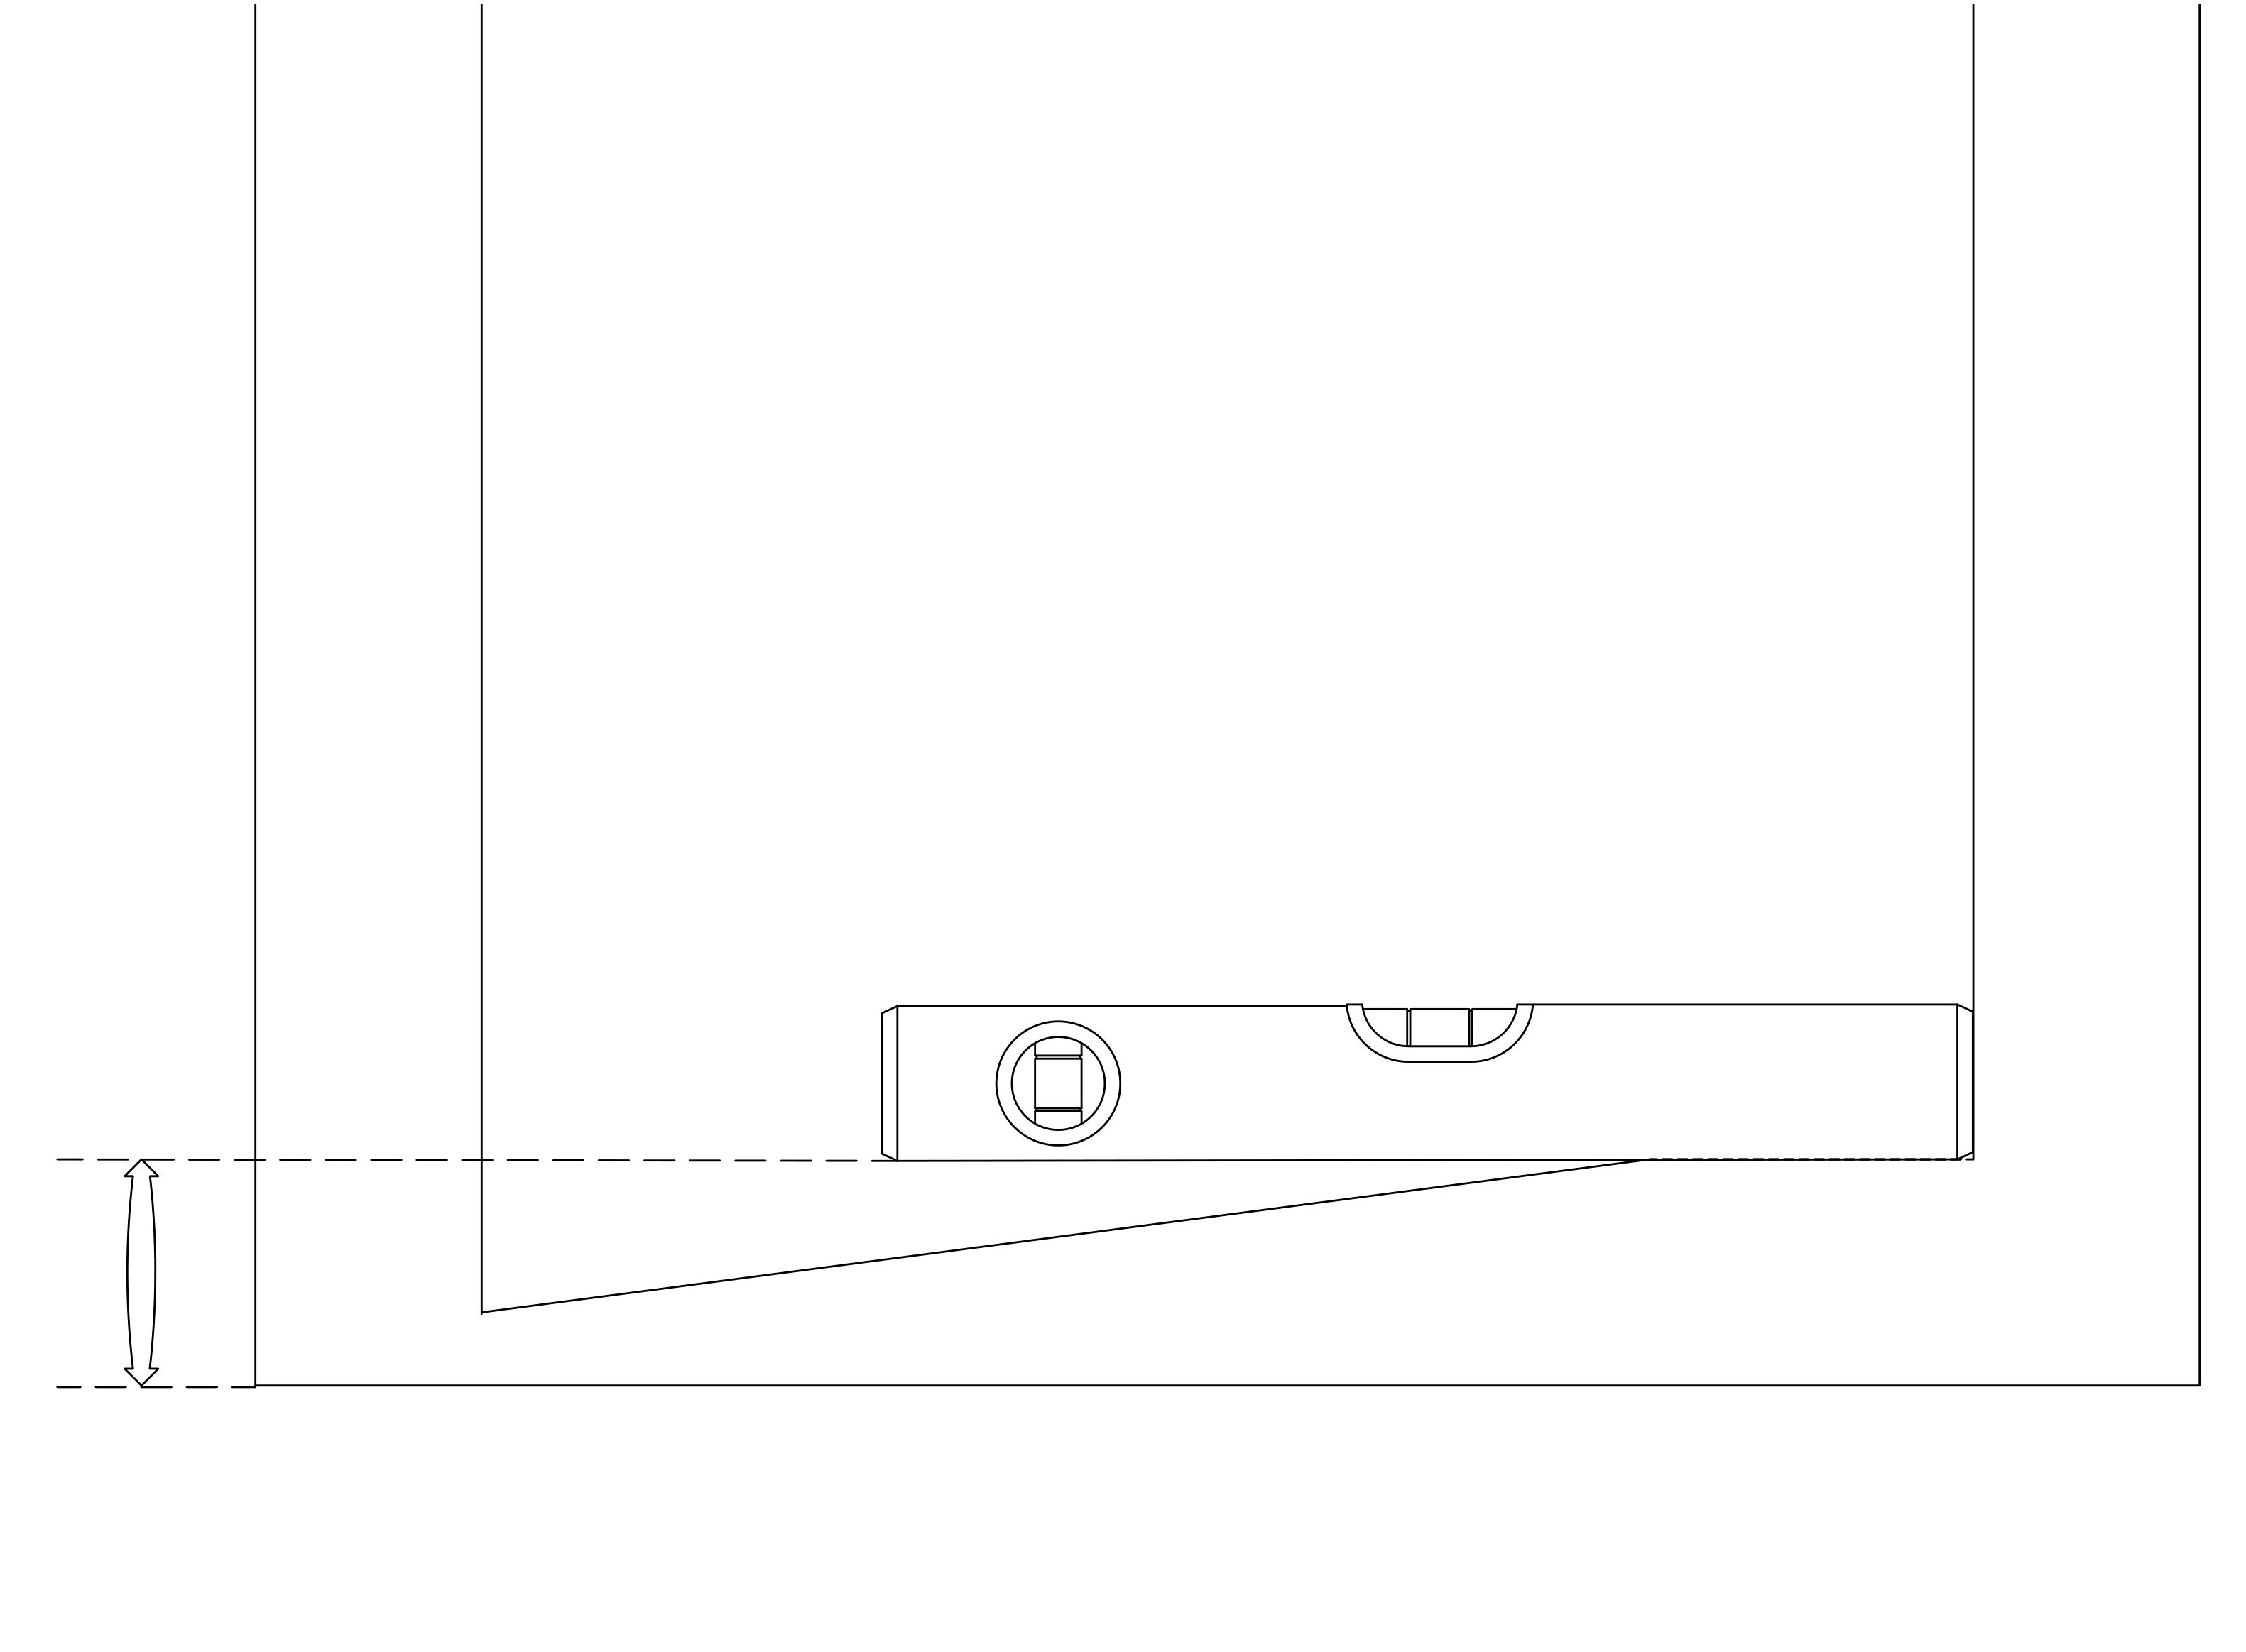
Ensure the Floor is Level
Like walls, floors can also shift over time in older homes, and in many bathrooms, the floor will not be completely level at every point due to the positioning of the floor drains. Most tiles slope gently towards the drain to ensure excess water drains away efficiently. Depending on the position of your new shower panels, you may find that the glass screen will not sit precisely level on the floor.
To check this, place your spirit level on the floor, and if it is out of plumb, measure the distance between the floor and the level. Like the wall measurement, this can be just a few millimetres or quite a large gap.
We recommend referring to your preferred frameless shower screen panel specifications, noting the maximum runout floor level of the panel to ensure the shower screen will suit your opening. If the measurement exceeds the tolerance that the glass panel is designed for, we can supply a custom showerscreen panel for you. Place an enquiry to find out more on our custom range.
Double Check Your Measurements
It’s a good idea to double-check your measurements before ordering or installing the shower screen panel to ensure that it will fit perfectly.
You’re Ready to Order
Once you have all your measurements noted down, you can refine the choice of Stegbar shower panels that will suit the space you’re working with.
Ready to get started? Take a look at the extensive range of shower screen options available in our DIY Buy Online store.
Your Cart
QUOTES
x0No products in the Quote Drawer.
Your Stegbar Quote
item(s)Attach Documents(Plans, Reports, Photos)
Installation
Product Selection Summary
No products in the Quote Drawer.
Your Quote
item(s)Quote submitted
Thank you for your quote request.
We look forward to helping you with your project.
You will receive an email confirming your enquiry number.
A Stegbar team member will contact you within two business days to discuss your project.